


What is Make.com (formerly Integromat)?
Make is a so-called iPaaS tool. iPaaS is not a plural of India Pale Ale, but an acronym that stands for "Integration Platform as a Service" - iPaaS. These tools are designed to connect different, independent programs with each other. They do this via so-called Application Programming Interfaces (API). APIs are interfaces between digital applications. Other well-known providers of such iPaaS include Zapier, n8n and Workato.
iPaaS tools work according to the "If-This-Then-That" principle - in other words: "If this happens, that should happen". A simple, analogous example: "When the light switch is pressed, the light should come on."
Make is one such iPaaS tool. With Make, thousands of apps can be linked together in various "scenarios" to automate digital processes and exchange data. The whole thing is intuitively designed.
Make is very beginner-friendly and is much clearer than comparable iPaaS tools thanks to its open user interface. This allows you to keep an eye on the entire process, even if your scenarios subsequently become complex. In addition, with almost 3,000 applications, Make offers a huge selection of apps that you can link together - and with the integrated tools and functions, you can control any interface, even if no app is natively available in Make.
Connecting private Google accounts - why so complicated?
To automate your processes and connect different systems with Make, Make needs access to these apps. There are various ways to grant this access. Make makes it very easy for you to authenticate yourself with your business Google, for example, to allow access to your Google apps such as Drive, Sheets or Docs.
BUT - There is always a but.
For private Google accounts - i.e. those that have an @gmail.com or @googlemail.com domain - this has unfortunately not been so easy for some time. So to connect a private Google account with Make.com, you have to go through a detailed process. Google argues that this increases security. Maybe so. That sounds good at first, and it's certainly not an issue for experienced developers. The irony of it all, however, is that this process affects those who often want to work privately with no-code tools and are therefore (probably) not developers.
Attention: the whole thing feels a little like this ☝
Make.com has provided its own guide for this process, which covers the basics, but doesn't lead to the desired result in the end. So here is our VisualMakers Guide + video.
Step-by-step solution + video
Note: The status of this article is March 06, 2024. If something does not work with this process or looks different, please let us know. Just send me a short e-mail to adriano@visualmakers.de
Important: The prerequisite for this is, of course, that you have a Google account.
I. Create Google Cloud Console project
- Log in to your Google Cloud Console.
- You can create a new project at the top of the menu
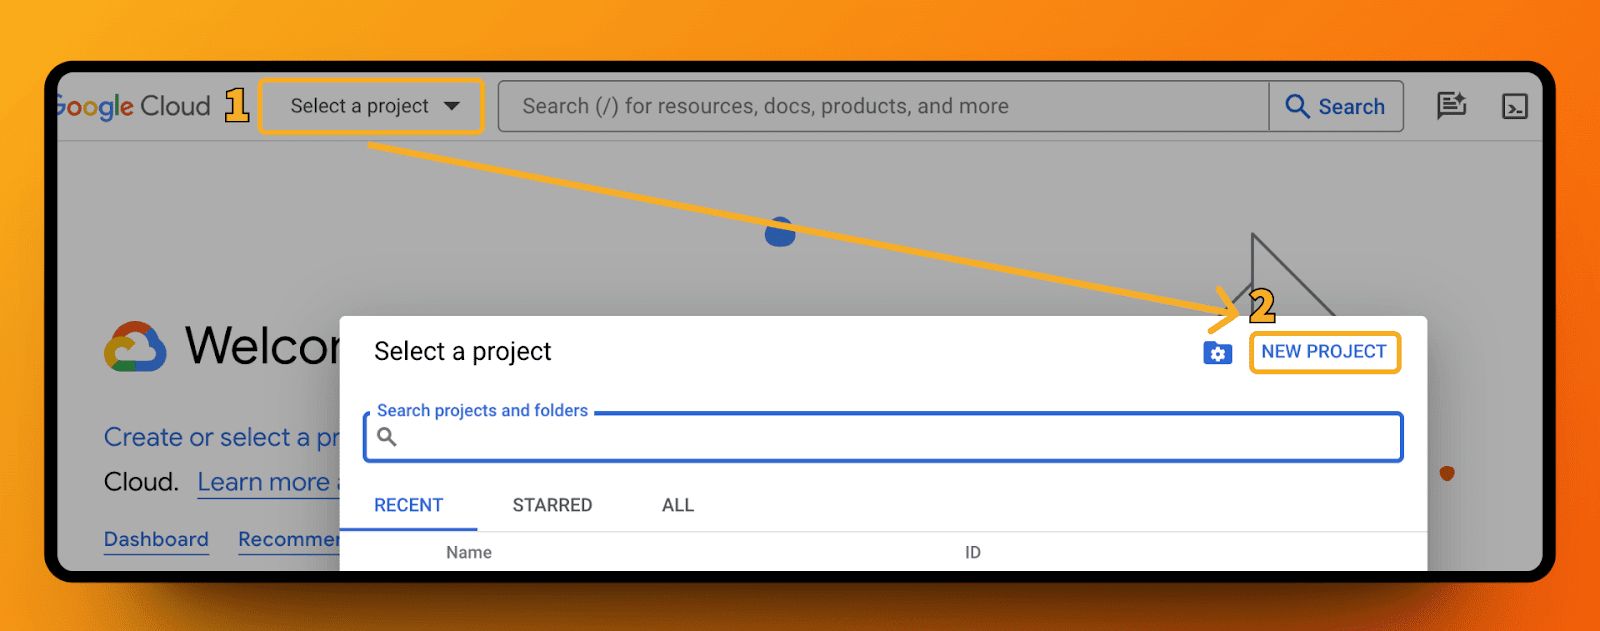
- Give it a suitable name and assign a location to it (if applicable)
- Click on "create"
Now check the top menu to see whether you are in the project you have just created.
II Add the right API
- If you are in the right project, make sure you are in the menu on "APIs & Services"
- Then go to the menu item "Library" on the left
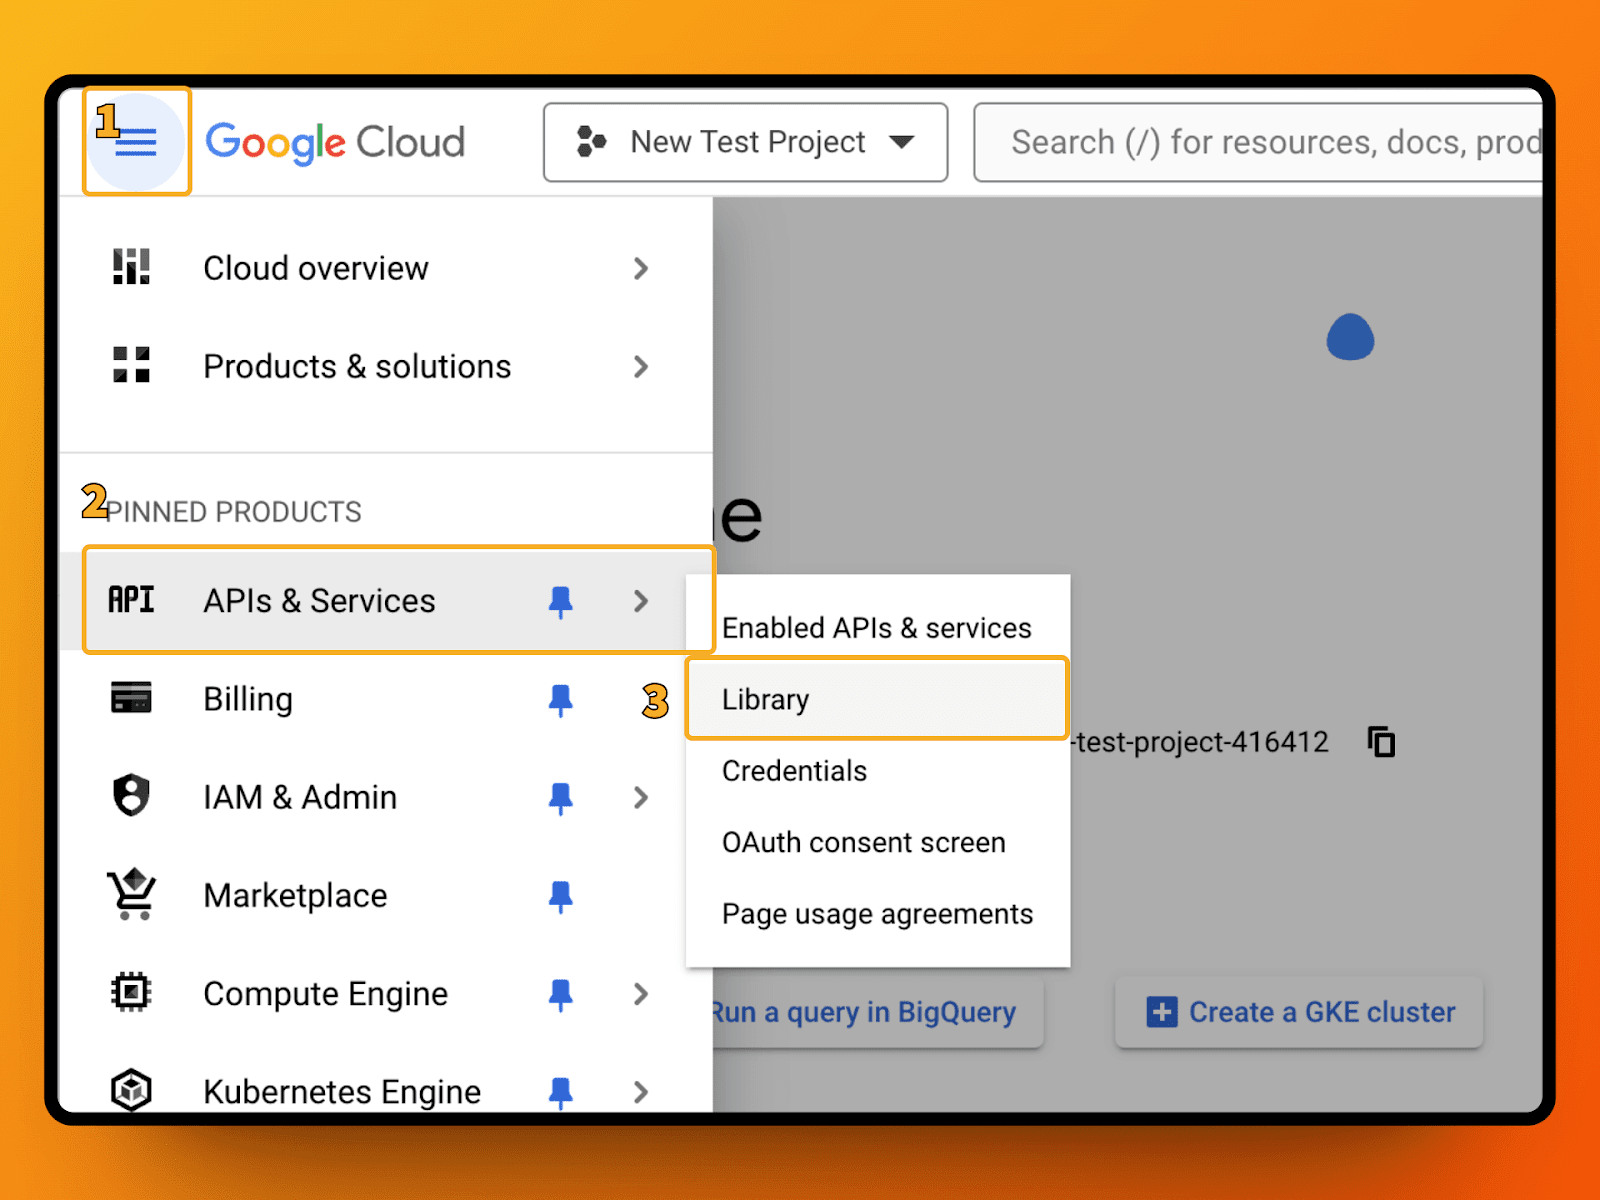
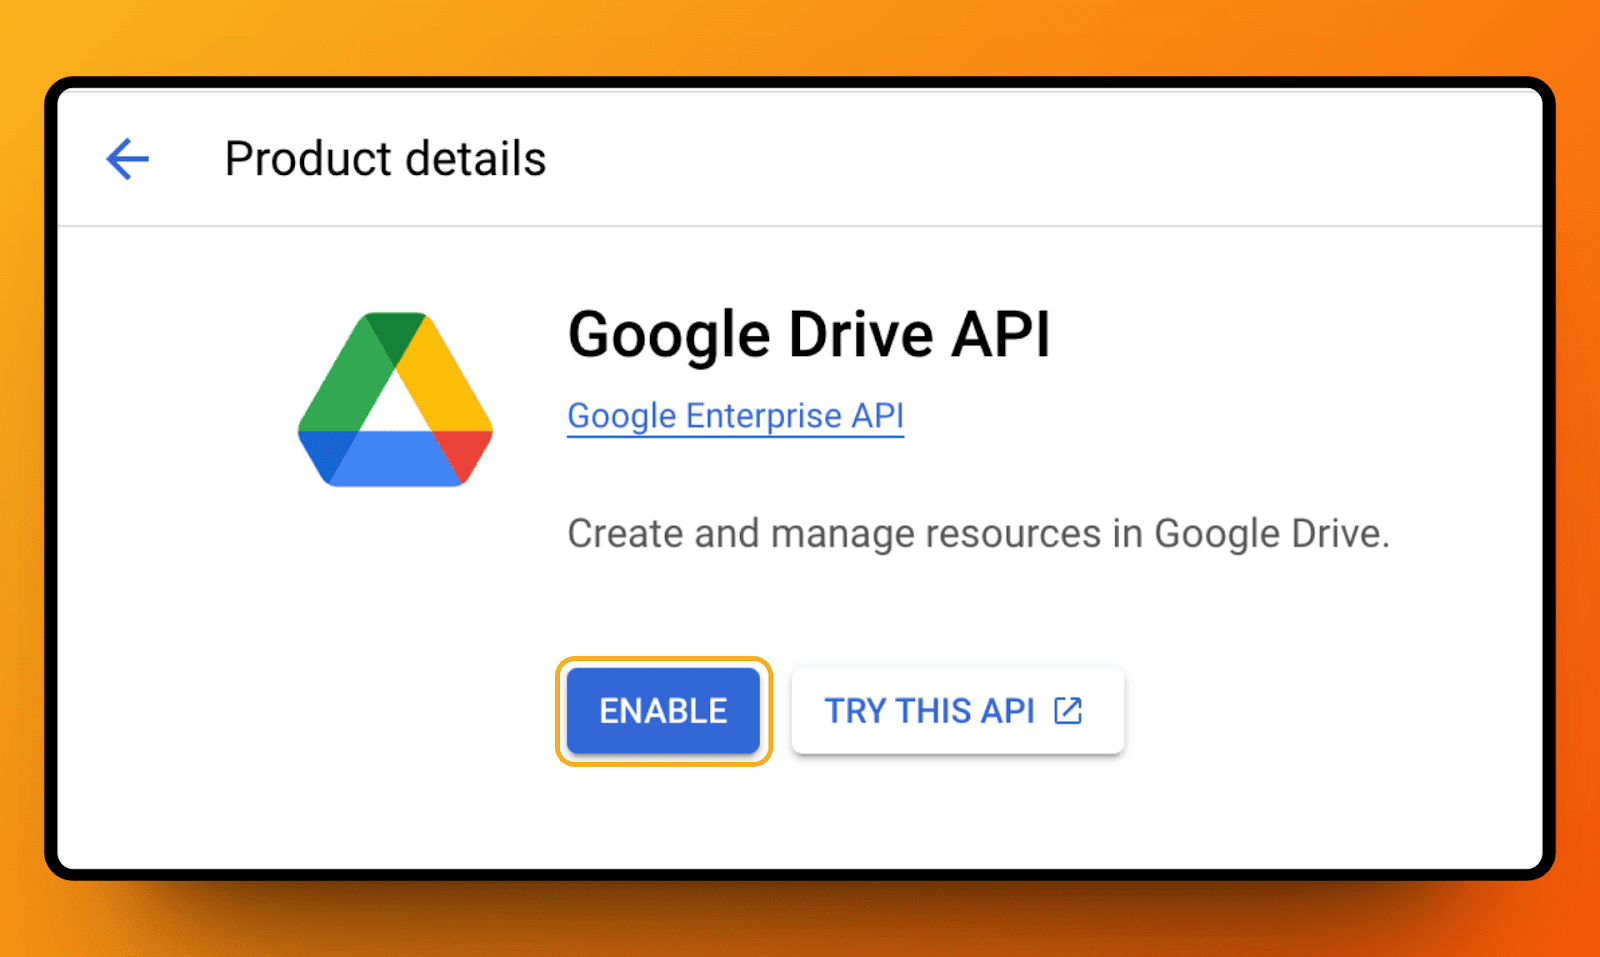
- For example, select the "Google Drive API" (or any other API you need)
- Click on "Enable"
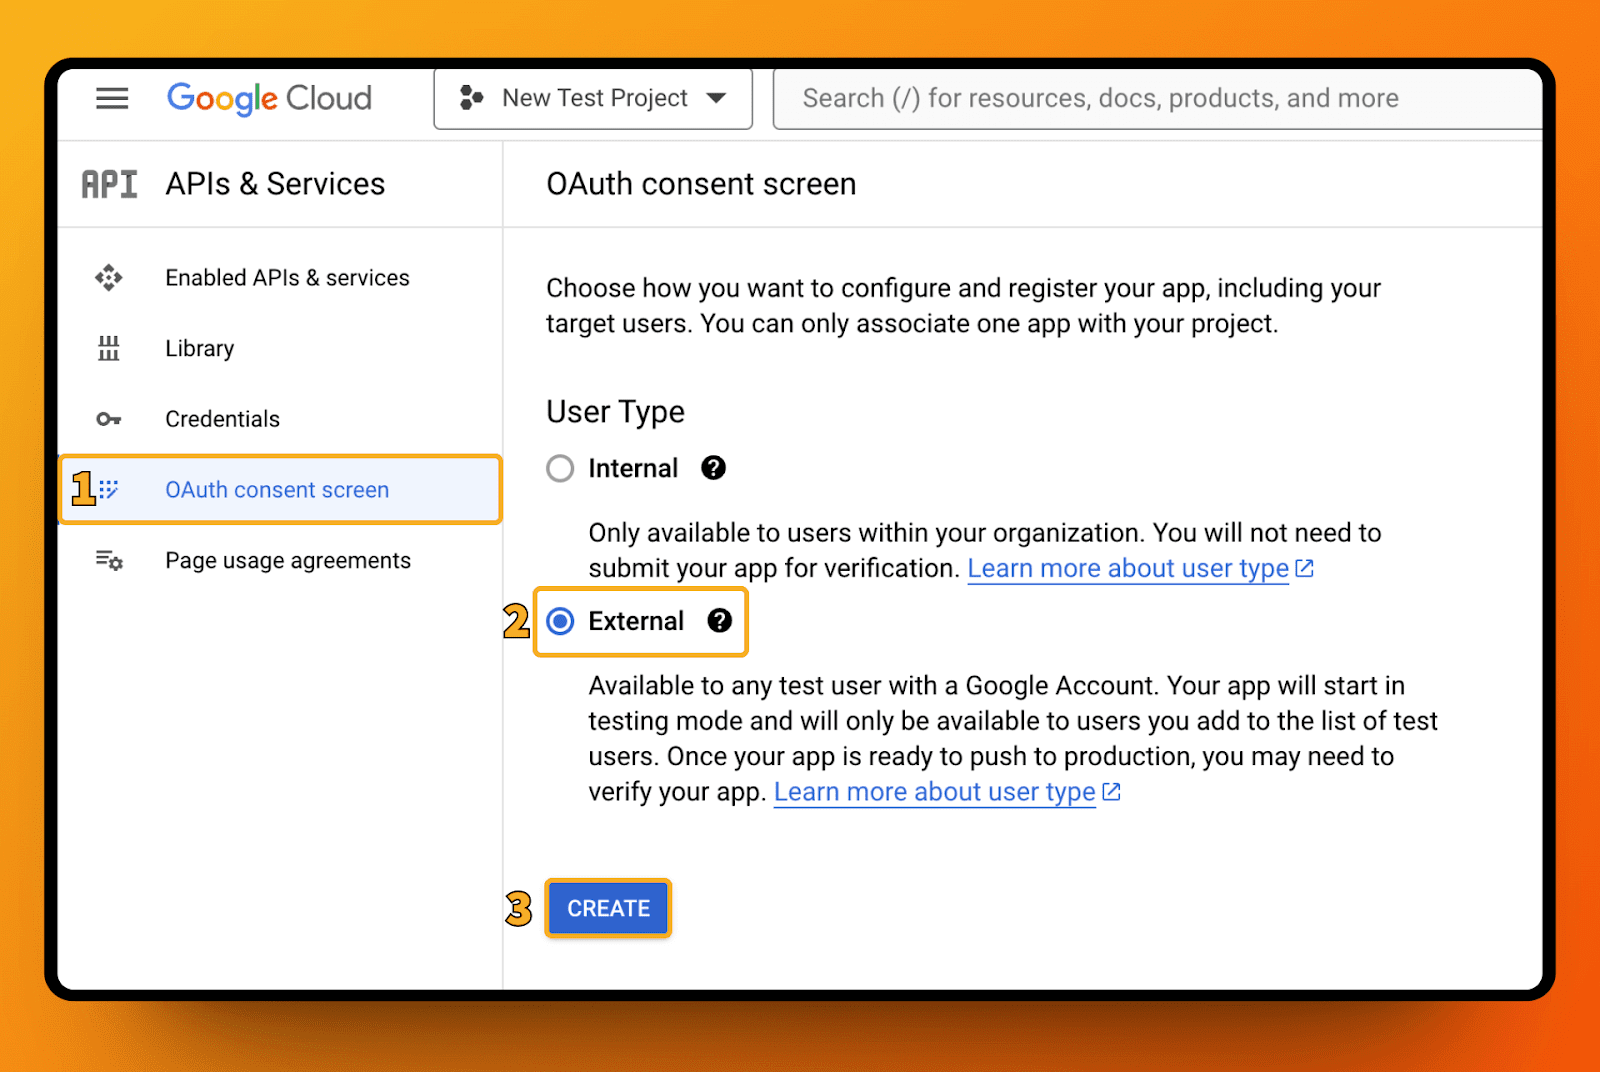
III Configuring the OAuth Consent Screen
Now click on "OAuth consent screen" in the left menu
Internal vs. external
Internal: With this option, only internal users have access to your Google APIs. However, this only works if you use a Google Workspace. As a private Google user, this is probably not the case.
External: We must therefore work with the external option. There is another subdivision here later:
- Testing: Only selected users with your authorized Google account can access your Google APIs.
- Publishing: Anyone with a Google account can have access here. The whole thing must first be verified by Google.
1. click on "External" and "Create"
2. fill in the required fields
Name: think of something
User support email: This is your private Google address
Developer contact information: this is also your private Google address
3. click on "Save and continue"
IV Select scopes
Scopes are basically the things that the app (in our case Make) can/may do via your Google API. You must first set these and thus give Make permission.
- Click on "Add or remove scopes"
- Select these two scopes:
.../auth/docs
.../auth/drive
These are the two most important ones for us. You can of course choose anything else you need.

- Click on "Update"
- Click on "Save and continue" at the bottom
V. Select test user
If you initially remain in the test environment, you must enter the users who are to have access.
- Click on "Add Users"
- Enter your @gmail e-mail address
- Click on "Add" and then "Save and continue"

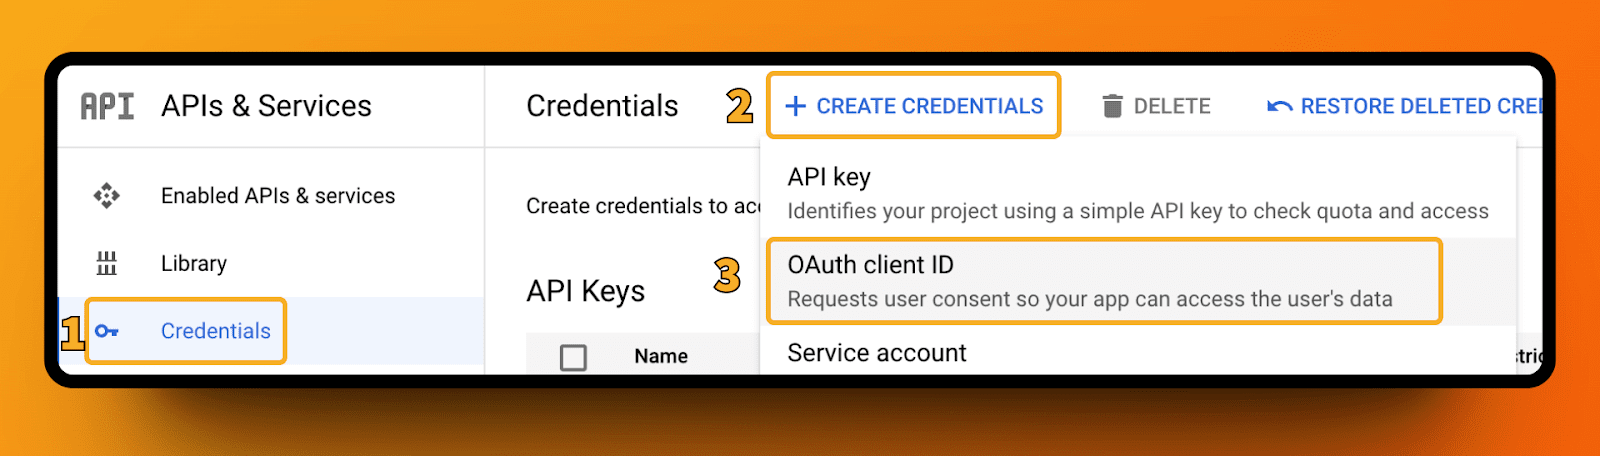
VI Create credentials
So far so good. So far, we have only authorized an API in our project that can access our Google Drive, and only for us as test users. We haven't talked about Make.com yet. We are now building the bridge to Make.
- Go to "Credentials" on the left
- Click on "+ Create Credentials" at the top and select "OAuth Client ID"
- Application Type: Web Application
- Name can be e.g. "Make GDrive OAuth" or whatever is best for you
- You must enter this URI in the "Authorized redirect URIs" area:
- https://www.integromat.com/oauth/cb/google-restricted - für Gmail und Drive
- Alternatively: https://www.integromat.com/oauth/cb/google/ - for other Google apps
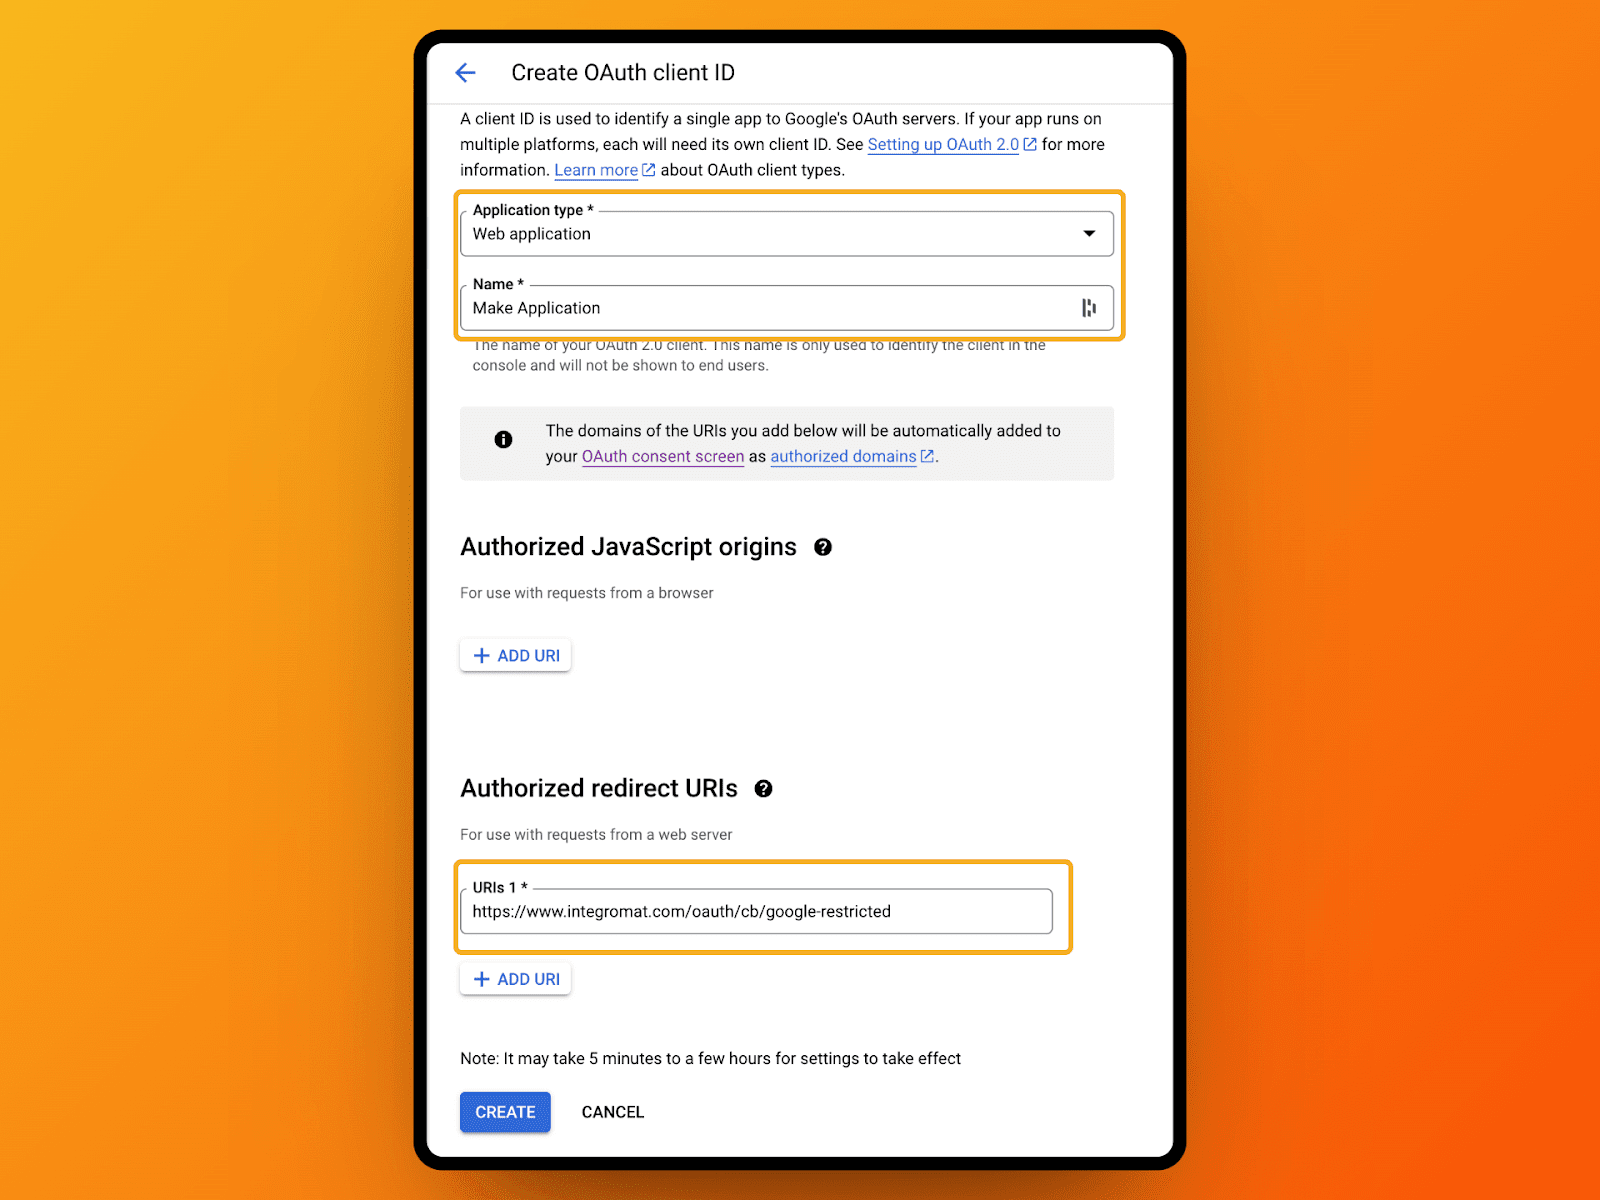
- You will then be shown the access data for this OAuth client. Save them somewhere safe
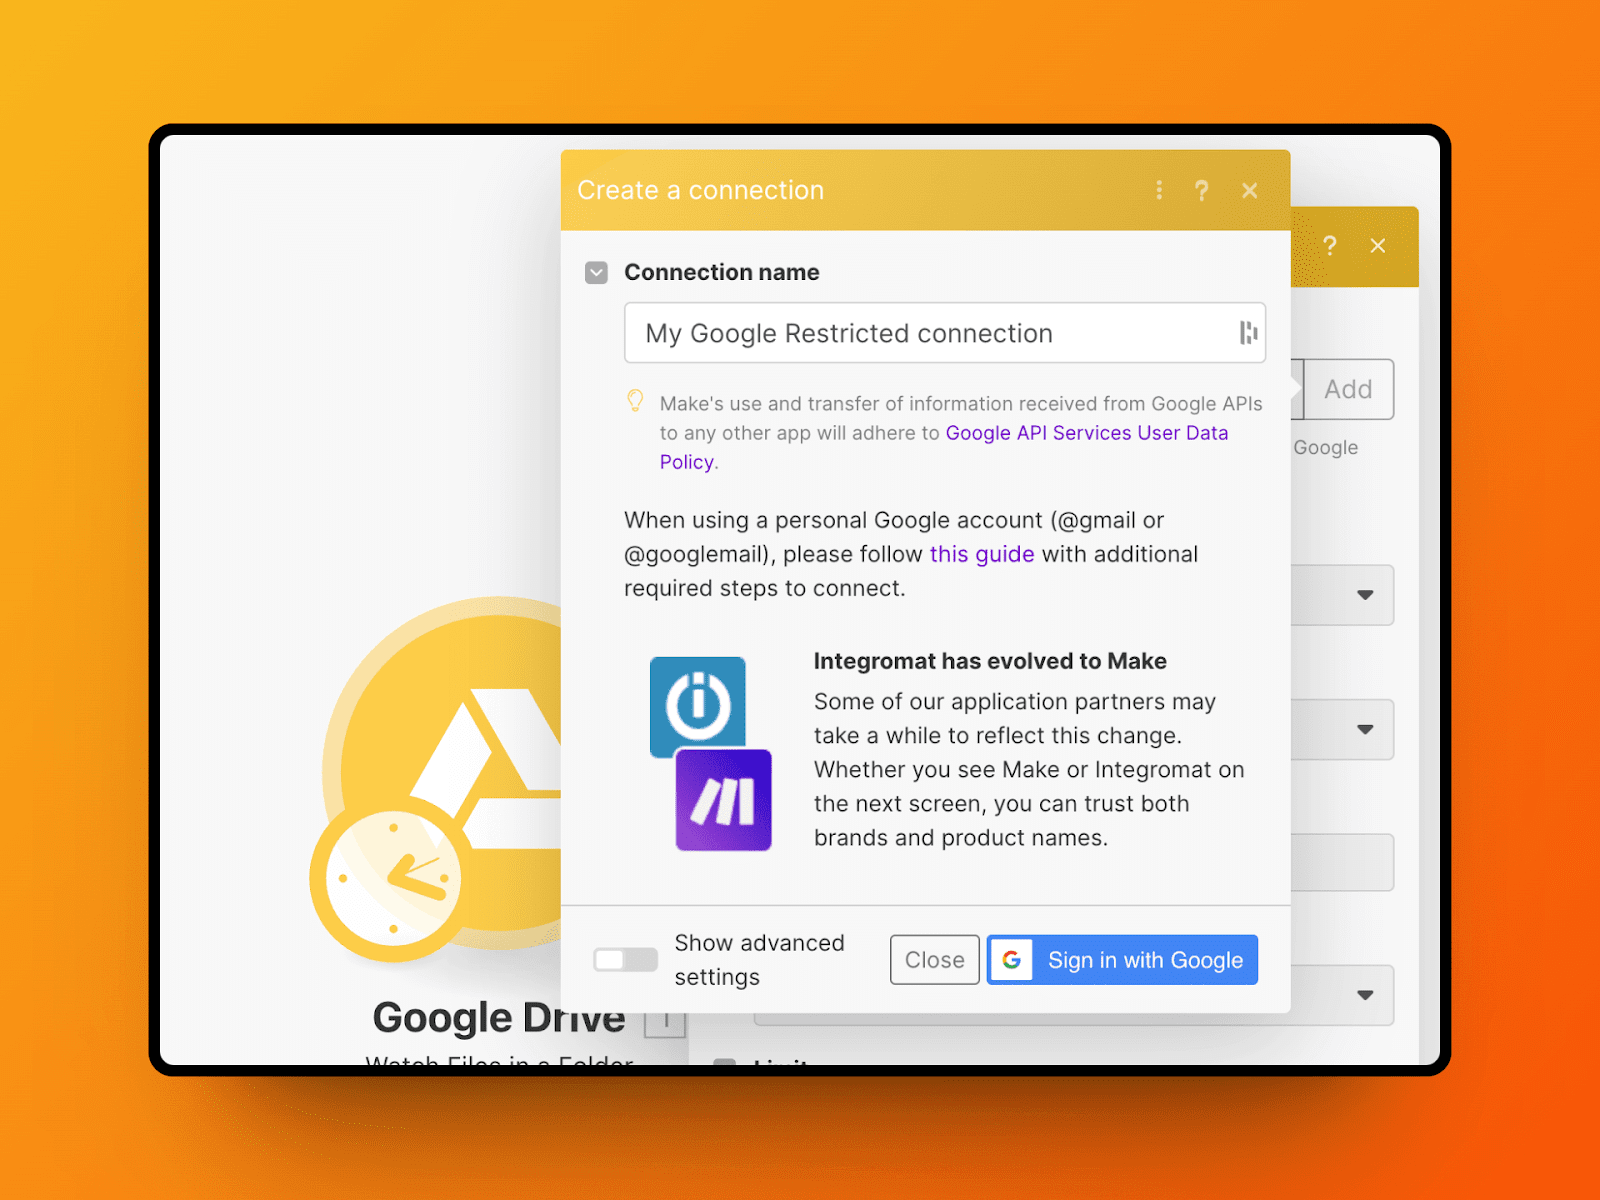
VII. In Make.com
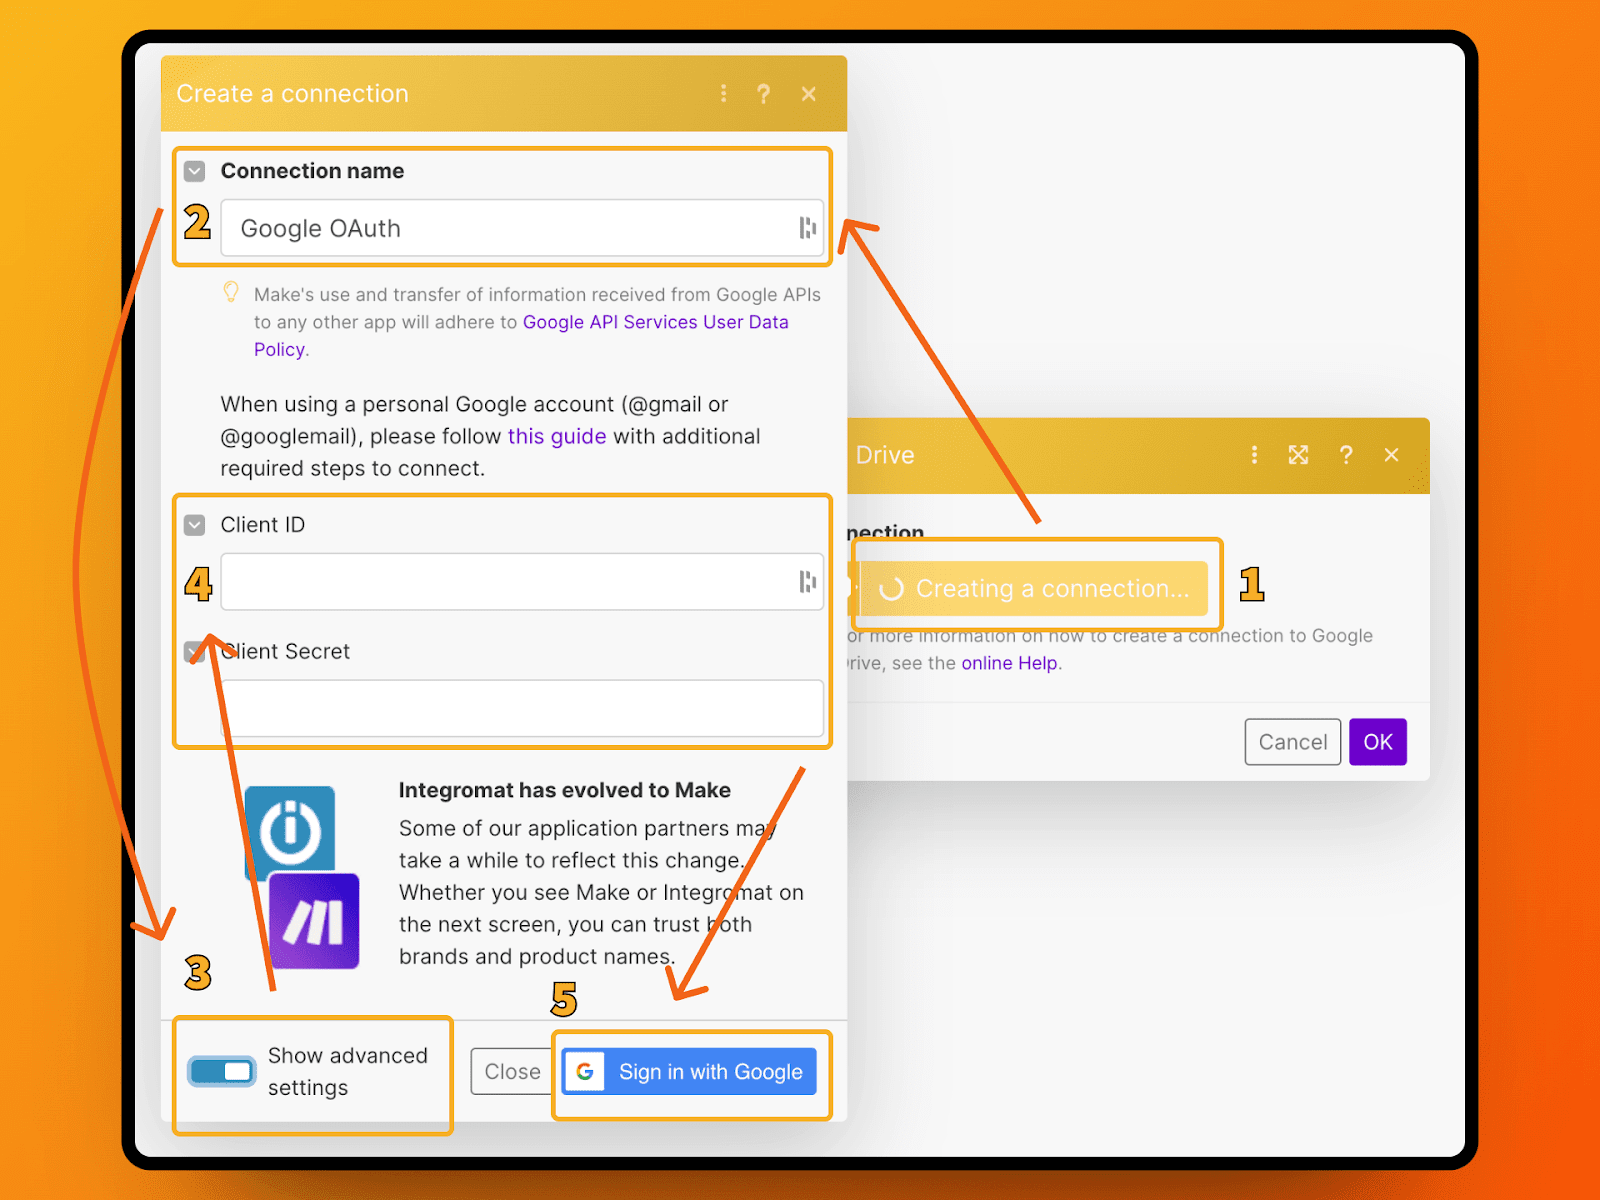
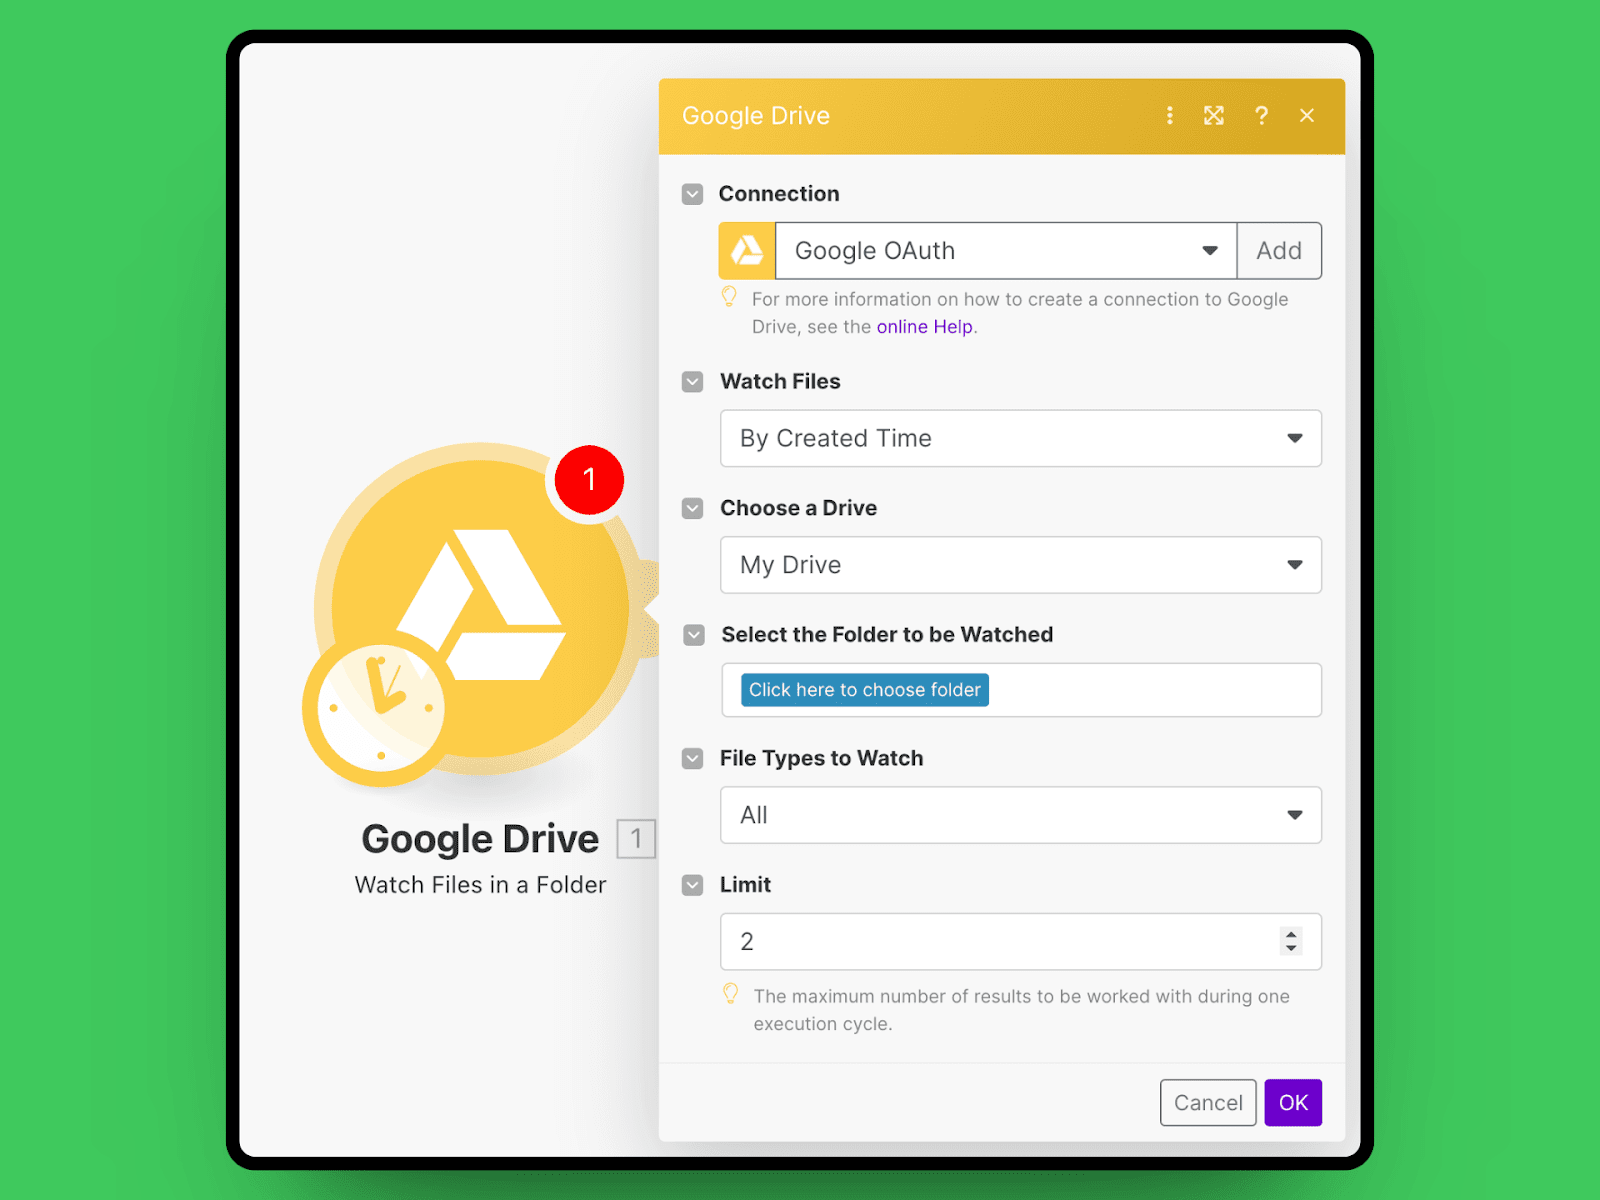
- In your scenario, select the Google Drive (or Gmail) module
- Click on "Create a connection"
- Give it a name, e.g. "Google OAuth"
- Open the Advanced Settings at the bottom
- Enter your Client ID and your Client Secret
- Click on "Sign in with Google"
- New tab opens - wait until you see the Google interface.
!Attention: This can sometimes take a little longer and in the new tab it may sometimes say that something is not working, although the page is still loading and works fine.
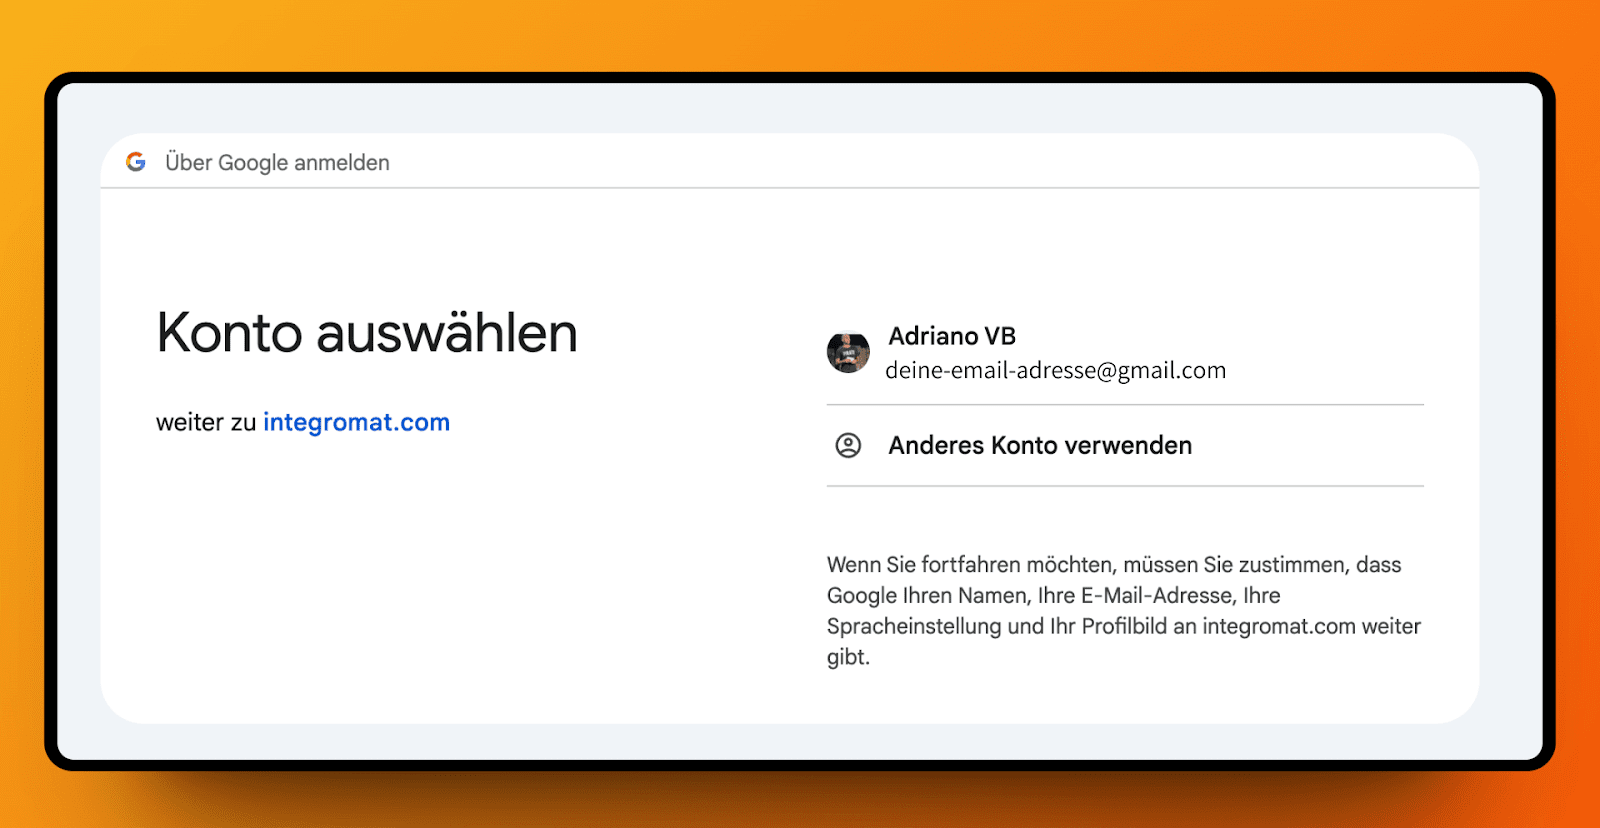
- Select your account and then click on "Continue" when prompted
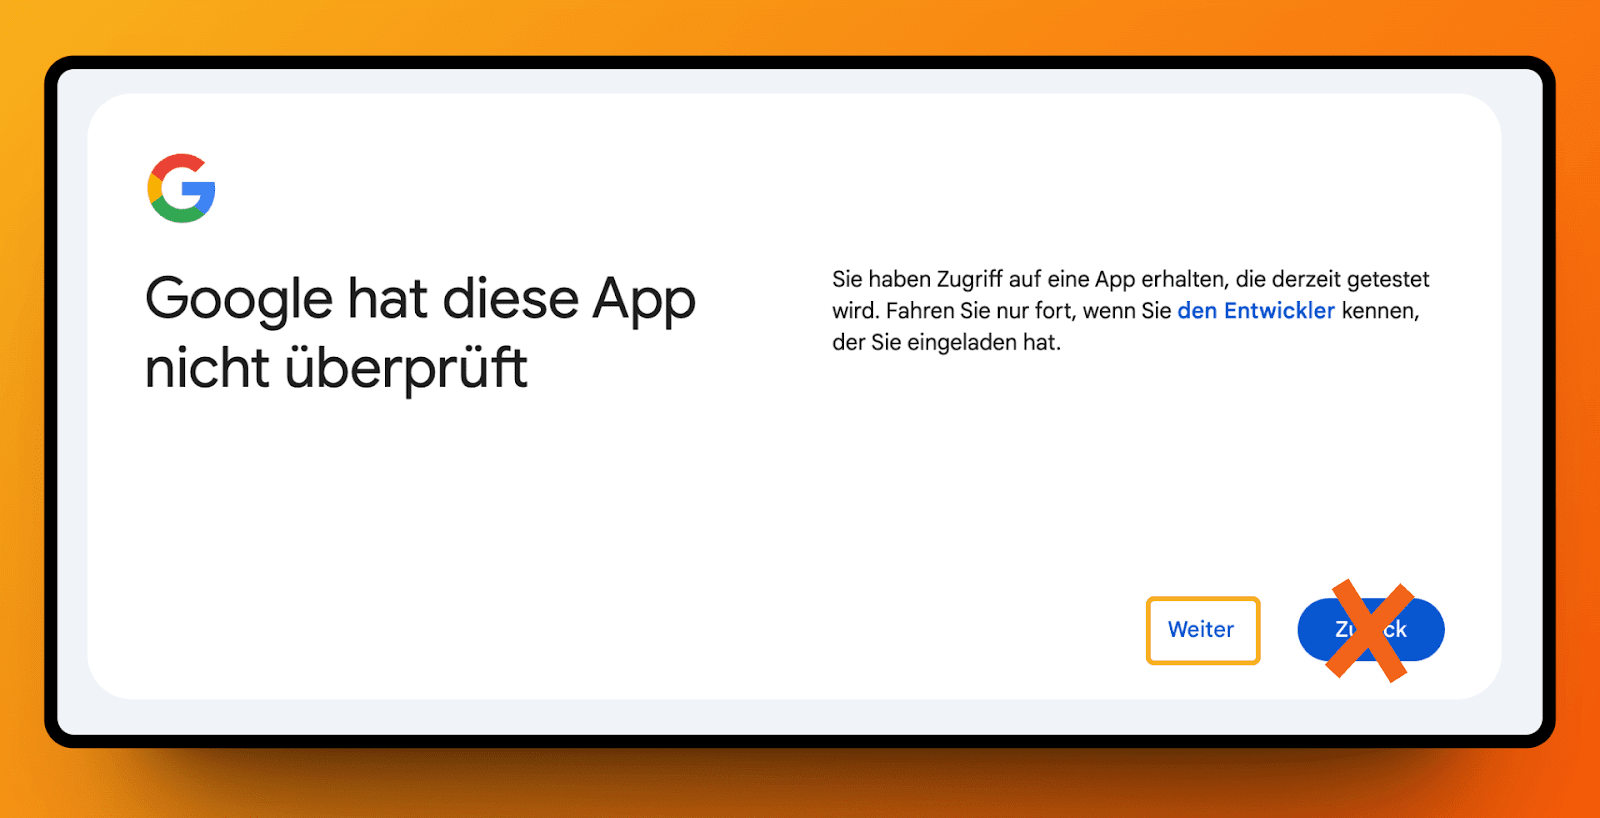
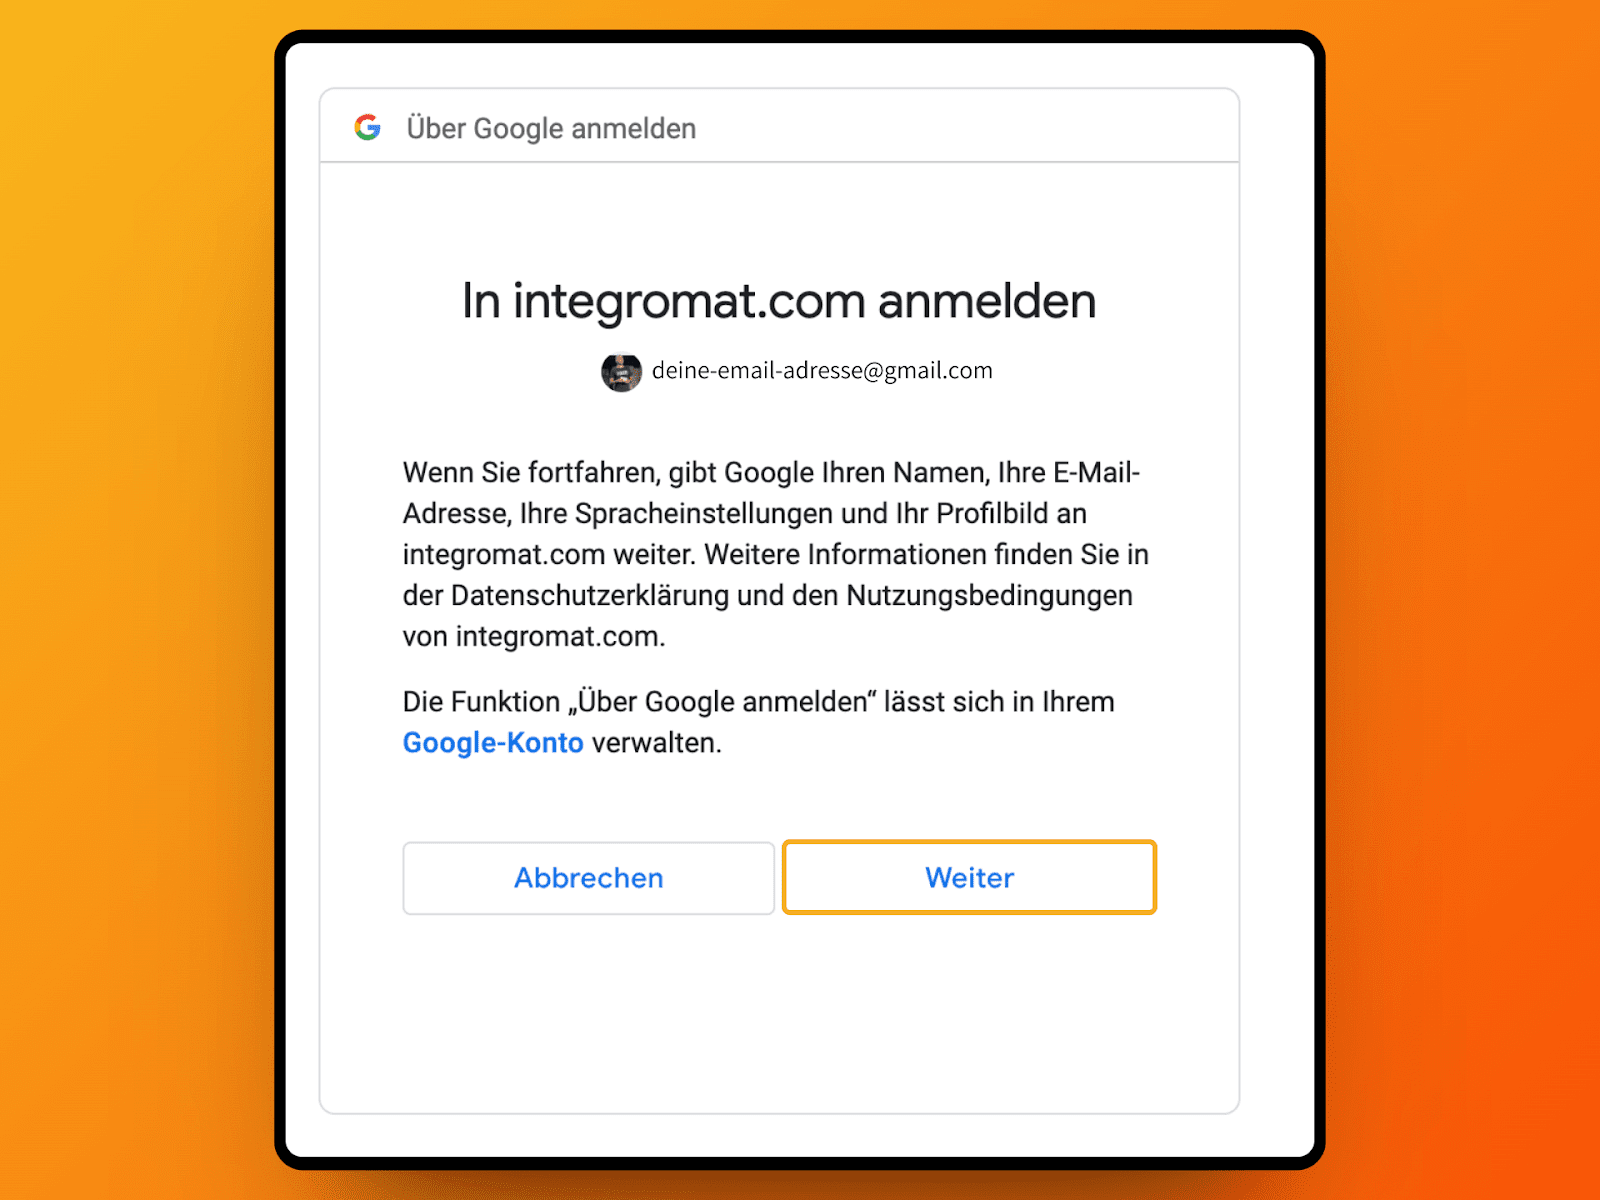
- Click on "Next" again
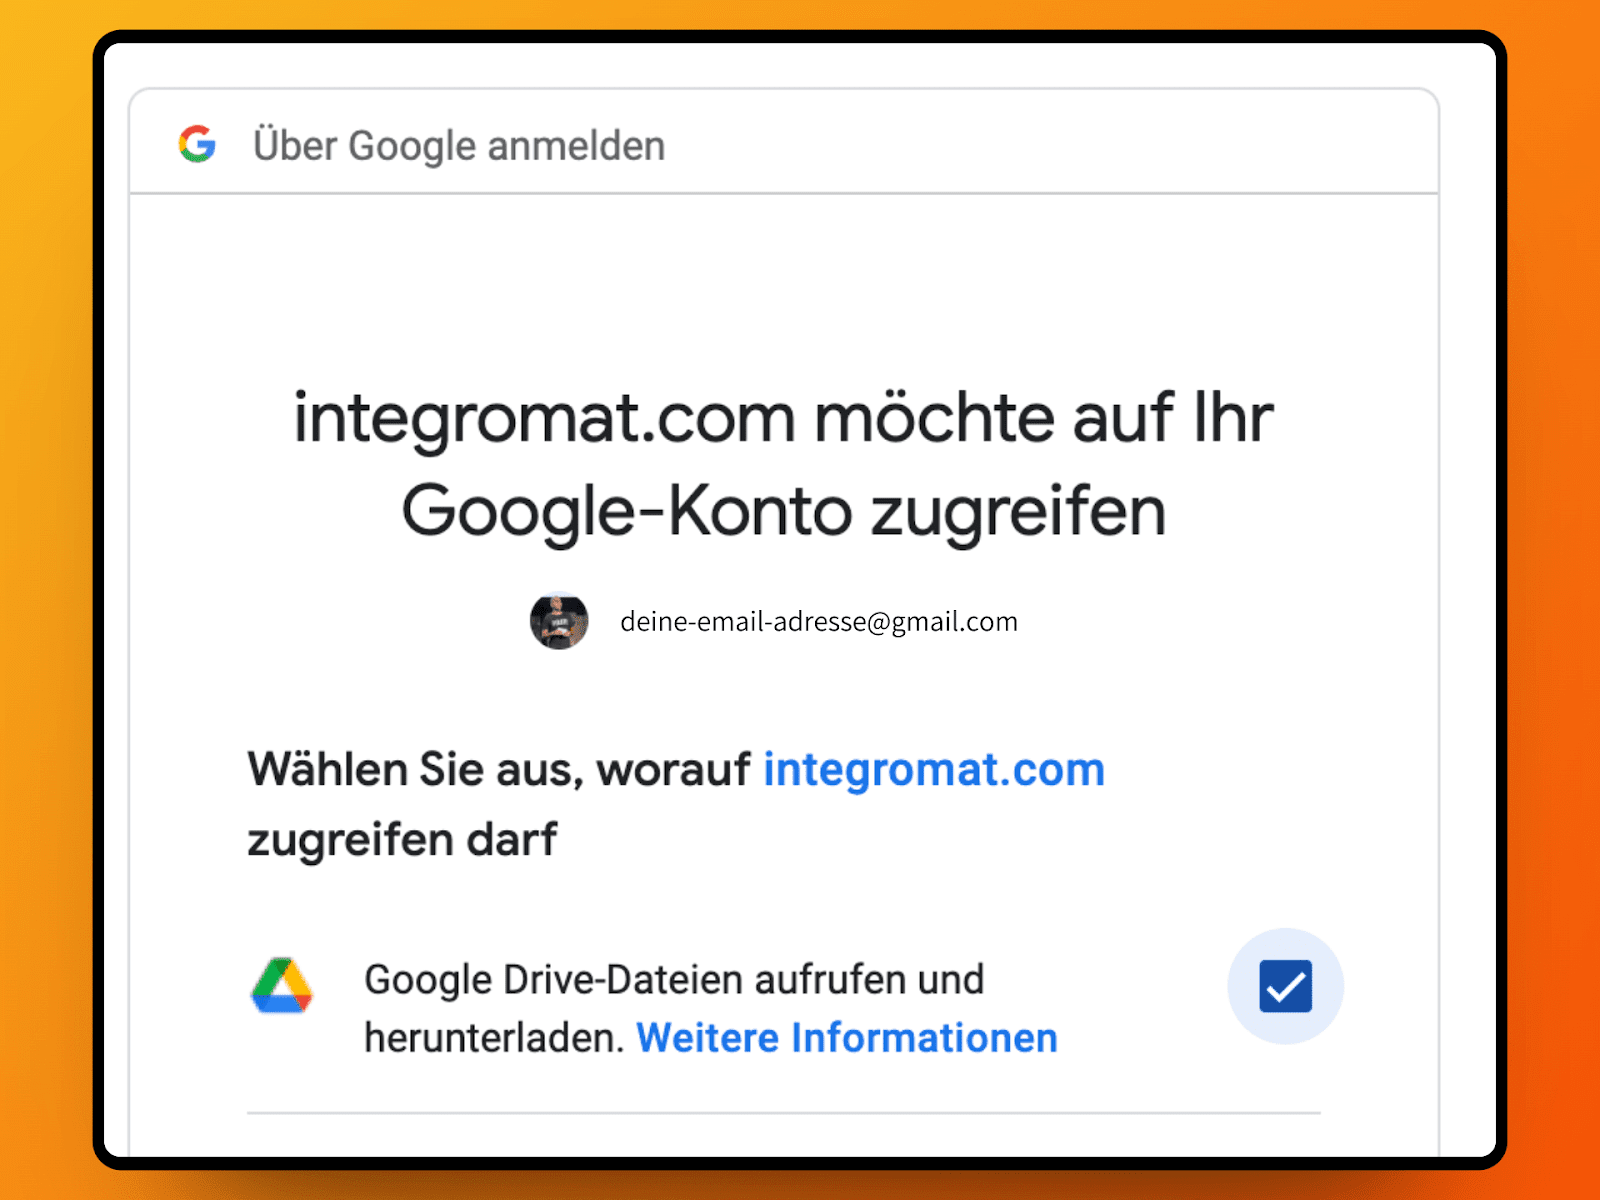
- Check the Google Drive box and click on "Next"
And if everything went well, you should now see in Make that the module is connected. It will look like this:
Now open your cell phone's selfie camera... This is what winners look like!
Yes, the whole thing is a pretty annoying process. Unfortunately, this is currently necessary to connect a private Google account with Make. We hope that this will change for the better in the future.
Did nothing work out?
Come to our Slack Community and write to me (Adriano from VisualMakers) about the error message you're getting. Then I'll be happy to help you!
Free Make Fundamentals course

If you want to learn what else you can do with Make.com, then take our certified Make Fundamentals course! In 12 lessons, I'll introduce you to the world of Make with examples and simple explanations.
-> CLICK HERE FOR THE COURSE!

